Rainforest Rambling

The Pinto Commission

One of the jobs I worked on last year was for a friend’s cafe. I was commissioned to design a pattern which they could use for their business; something which would work with their existing logo and complement the aesthetics of the cafe and its surroundings. The cafe itself, Pinto Coffee+, is a charming and rustic place situated on a small hill in Kampung Janda Baik, just 40 minutes from Kuala Lumpur. Built almost entirely of wood, Pinto blends beautifully with the tall trees and lush tropical greenery that surround it, while its open-air concept allows the cool breeze to flow through even on the hottest of days. Having coffee at Pinto is a great way to escape the hustle and bustle of the city, and just unwind in nature. They also grow their own coffee and roast the beans onsite - which adds to the cafe’s charm.

For this commission, I wanted my designs to reflect not just the visual aspects of Pinto, but also how it feels when you’re there. I imagined the rustling of leaves, the chirping of birds and insects in the forest, and sunlight streaming through the branches. I imagined the smell of coffee and thought about the colour palette: lots of rich, velvety greens, some mottled with brown, and the vibrant vermillions, oranges, and fuschias of jungle flora.

I decided to paint the motifs in watercolour. I wanted the vibrant colours that the medium offers, but more than that, I wanted the granulation and gradation of colours - my favourite characteristics of watercolour. I ended up designing twelve patterns for the client to choose from: ten patterns housed within two collections, and two standalone patterns. All save one began their lives as brush strokes on paper, then scanned and transformed into patterns in Photoshop. The one remaining pattern was done entirely digitally - initially in Procreate using a “watercolour” brush, then in Photoshop.

Over a series of blog posts I will write about all these designs, but today we begin with the first collection, Rainforest Rambling.

Rainforest Rambling: a mini collection

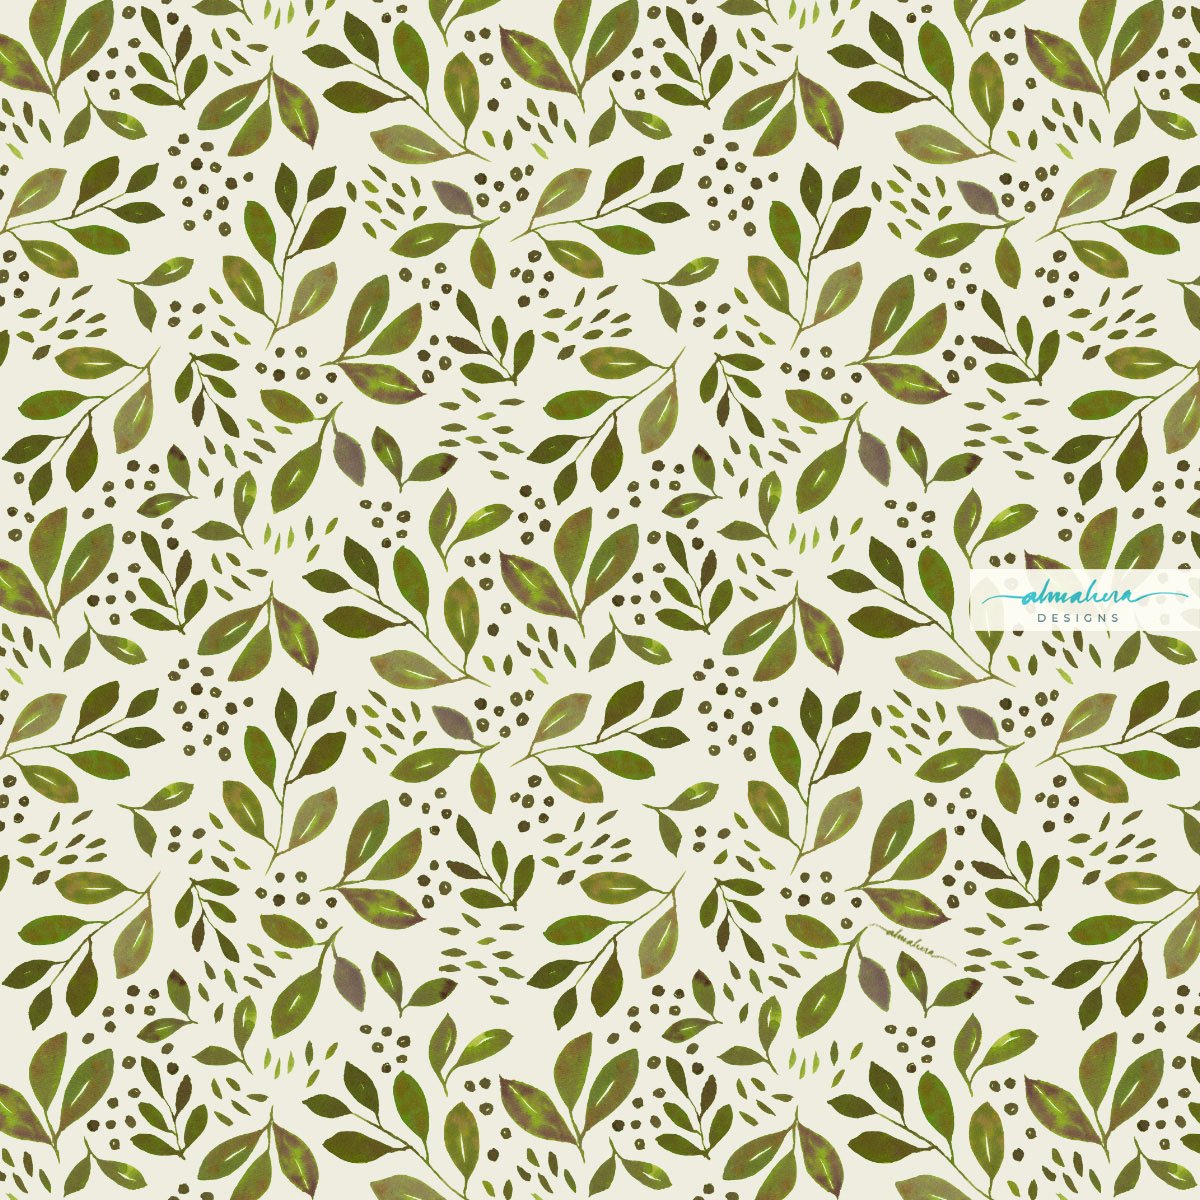
This mini-collection is made up of three seamless repeat patterns, and was inspired by long, meditative walks in the forest. The namesake pattern in this collection, Rainforest Rambling, is my interpretation of what you’d see were you surrounded by trees and looked up to the sky: a canopy of leaves and branches punctuated by rays of sunlight.

Rainforest Rambling

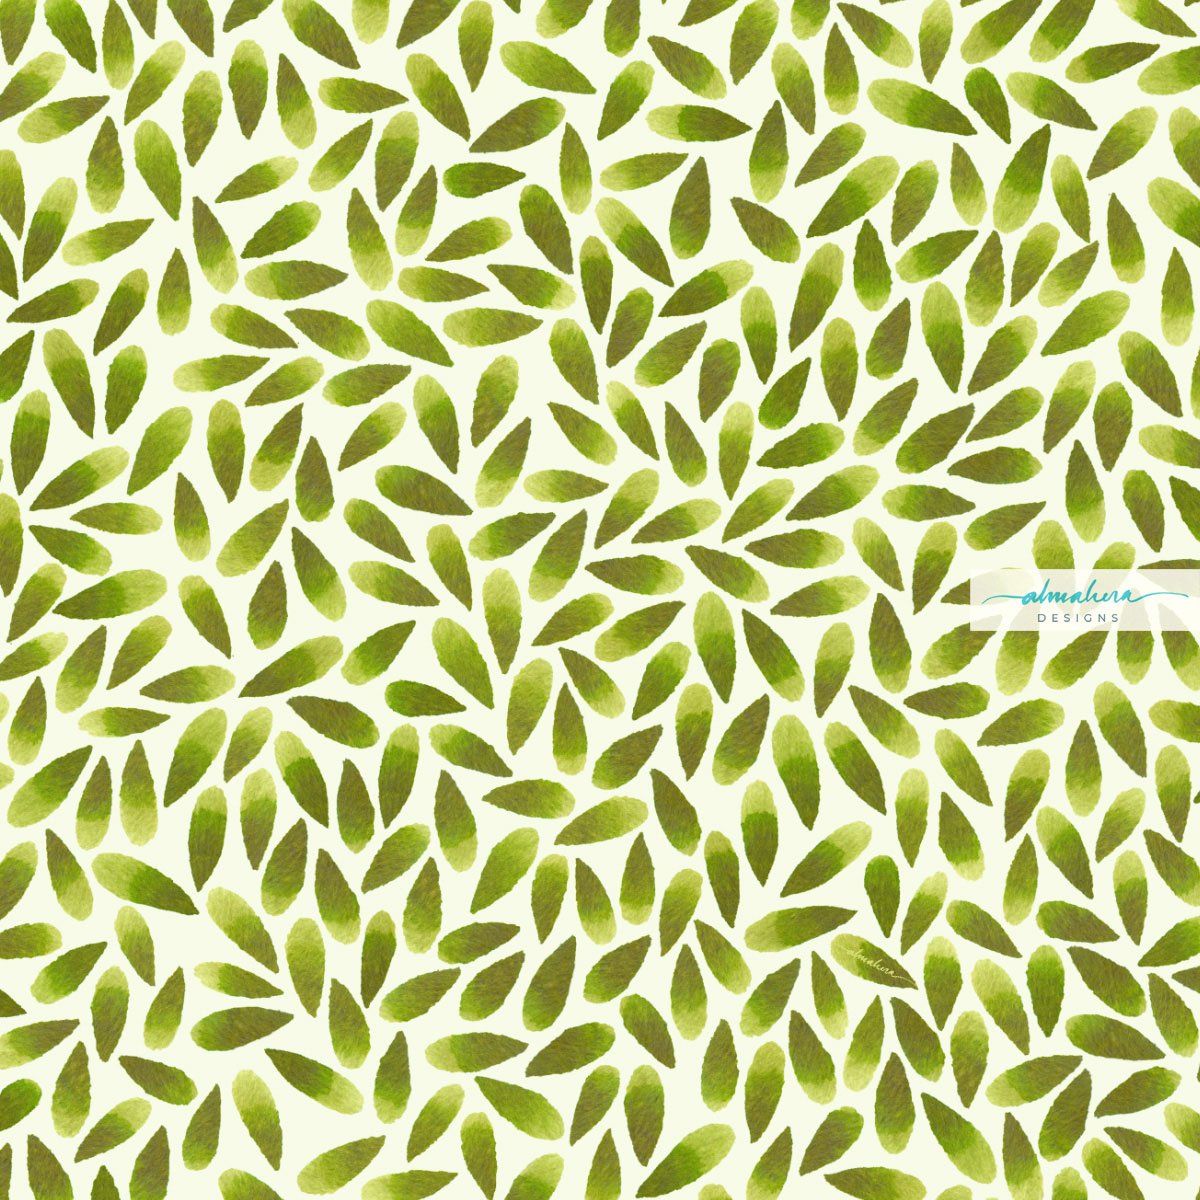
Breeze I and Breeze II, the other two patterns in the collection, remind me of small leaves swept off the ground by a gust of wind, dancing in the air.

Breeze I

Breeze II

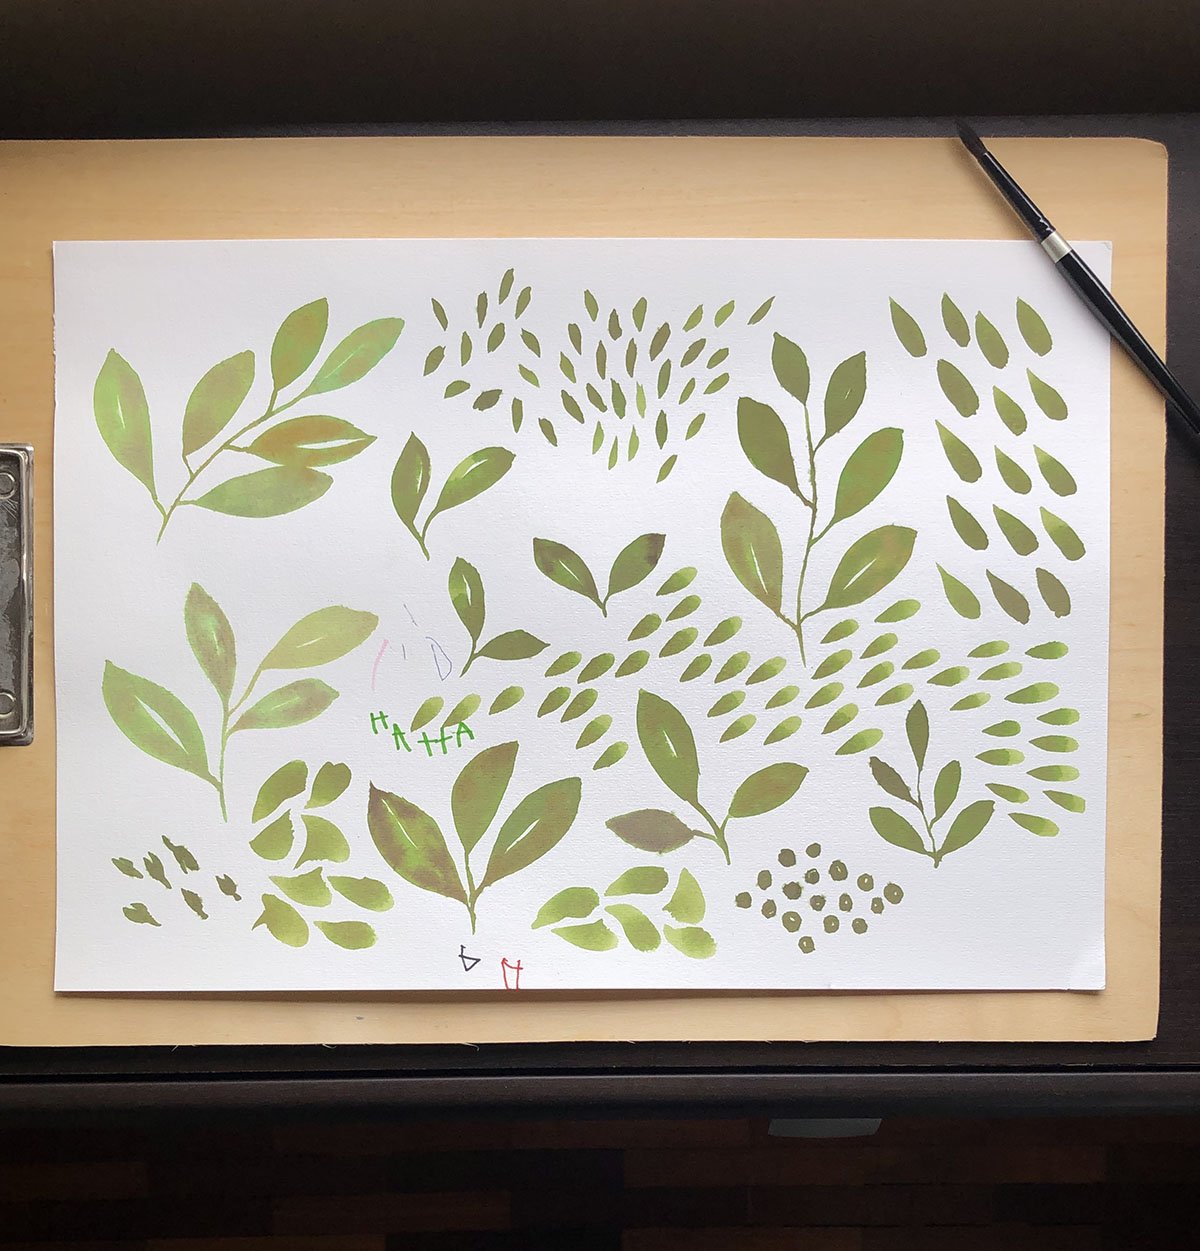
If my memory serves me right, I used liquid watercolours to paint the motifs (I really need be more conscientious with my behind-the-scenes/process photos). I scanned them in as usual once it was dry, and just in time, too - before my son decided to sign it off in his name.

Before the pattern - the motifs painted in watercolour.

The two Breeze patterns were an exercise in patience to make, but oddly therapeutic. It was essentially just placing and arranging each and every teardrop-shaped “leaf” on the art board, rotating each one a tiny bit to the left or all the way to the right to make sure it fits perfectly, while trying to make it looked somewhat “random”. I was using a 15”x15” art board, and each motif was about 1.5” long. So there were a lot of leaves to arrange on that board. When I was about 10% in, I thought to myself, “Ok this is ridiculous. It’ll take forever and a year to finish this. Whose brilliant idea was this?!?”

Mine. It was my brilliant idea. No one else to blame but me.

A peek into my working files. All those “leaves” (petals?) were arranged, one by one, on the art board.

So I abandoned it, and decided to start working on some other design options for Pinto. Which I did, and then I revisited Breeze. The second time around it didn’t feel as Sisyphean a task as it did before; the pattern was developing slowly and I could see the end. I actually enjoyed the process - so much so that after completing it, I decided to make a second version: Breeze II, which has more negative space and therefore feels “lighter”.

I’m actually glad I went back to finish it; the pattern doesn’t look half bad in my opinion, and based on the mockups I prepared, would actually work pretty decently on products.

Some product mockups using the Rainforest Rambling pattern.

More mockup fun!

Huh. I’ve just realised, after writing this, the irony of the name. Breeze I and Breeze II, were not by any measure, a breeze to make.

That’s all for now. Until next time, toodles!

-A-

Wallpaper Wednesday: Prickly Plants

It’s that time of the year again, when I find myself drenched and dripping in sweat just moments after stepping out of the shower. When the earth is parched and I can almost hear it screaming out for rain. When I look up at the sky and am immediately blinded by the bright, bright rays of the sun, bouncing off the clouds. When the days seem to get longer and it’s still too hot to be playing outside after 5pm. When the laundry dries to a crisp if I leave it out for too long. 

It’s that time of the year again. 

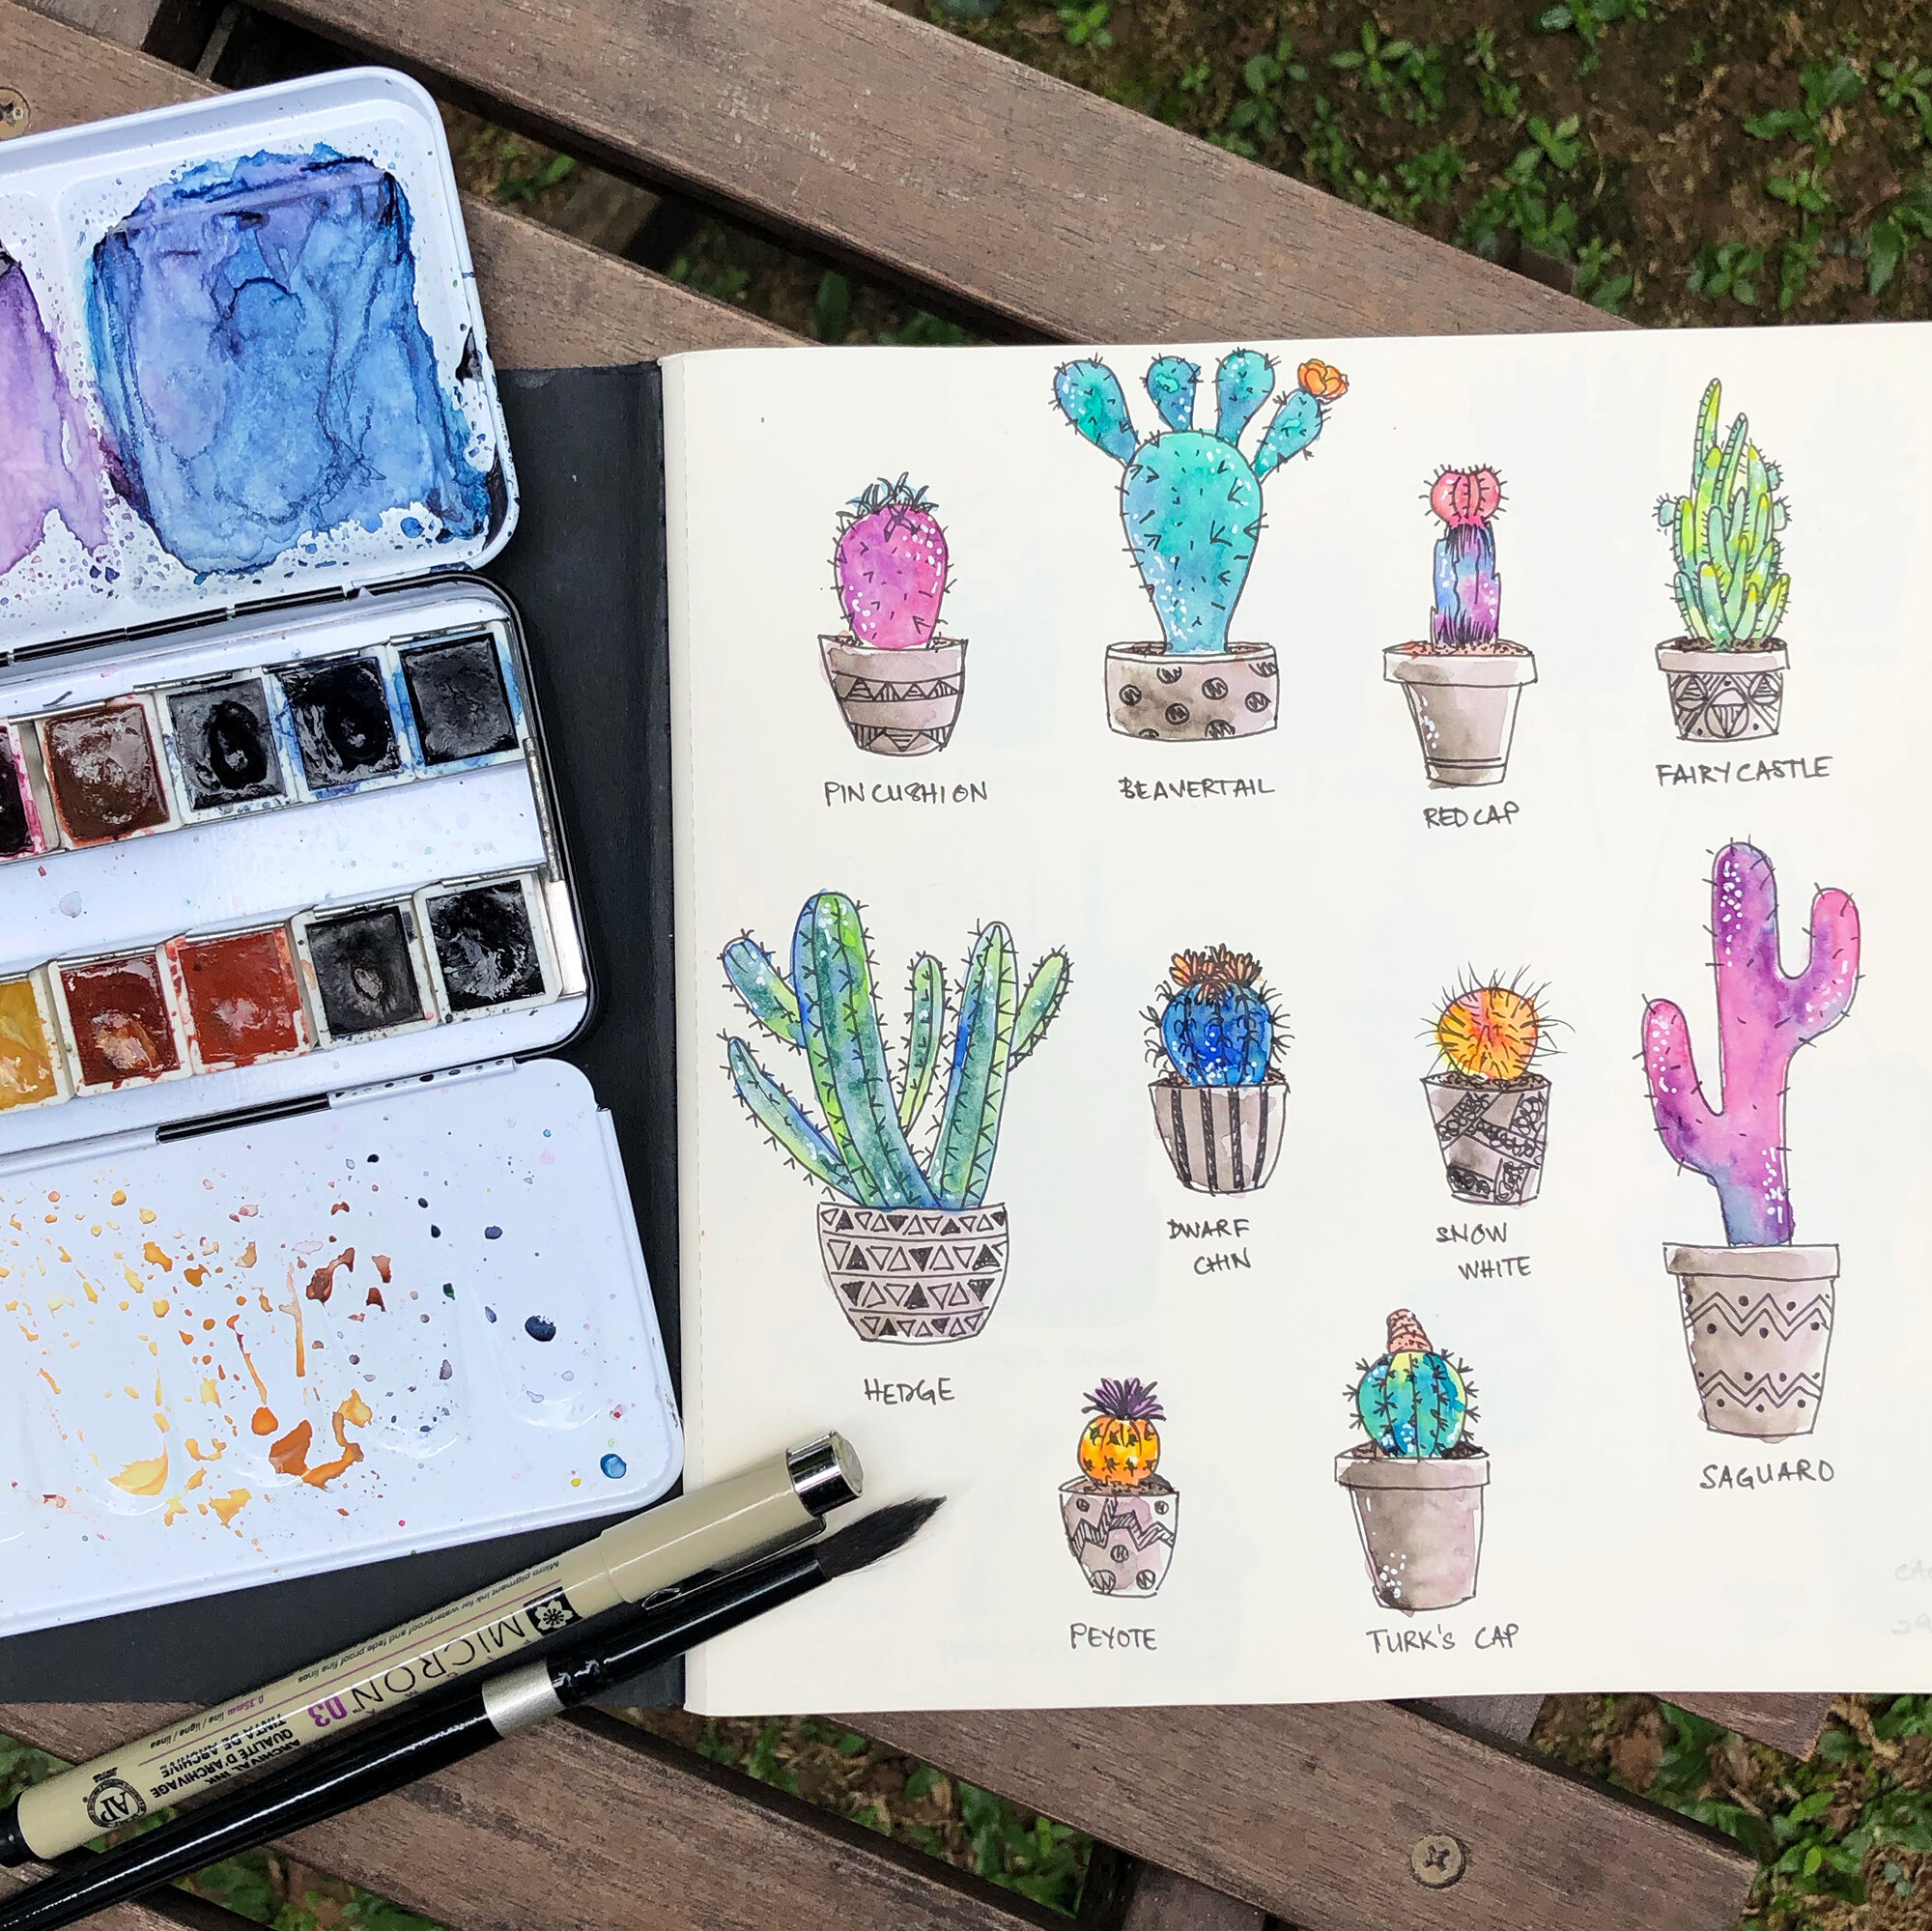
It was the scorching heat that inspired this month’s wallpaper design; it reminded me of some cacti and succulent doodles that I’d done a few years ago. I did it back in 2017, when I was following a line drawing tutorial by Peggy Dean, of the Pigeon Letters. When it came to giving the doodles some colour, I thought to myself, these are supposed to be green. Maybe a pop of red here and a bit of yellow there. But mostly green. 

How boring. 

I took out my paintbox and looked at the neatly arranged little squares of gorgeous rainbow colours, glistening like jewels in a treasure chest. I had to use them. I had to use them all.

And so I did. 

Cacti_Sketchbook 1_2000px.jpg
Cacti_Sketchbook 2_2000px.jpg

I painted them green and blue and purple, transforming them into plants you imagine you’d find in the underwater garden of a mermaid. Some I painted in red and orange and emerald green; the colours of a lush tropical rainforest. Others I clothed in pinks and purples, with a touch of indigo, and they became almost spring-like; the kind of spring you’d see if Mother Nature had turned up the contrast and saturation. 

I had fun doing it, but then I moved on to my next practice session, my next tutorial, and left the whimsical succulents sitting quietly in my sketchbook. I almost forgot I had them, had it not been for the confluence of the weather and the search for ideas for this month’s wallpaper. 

So now they’re here; resurrected, given a new lease of life. Waiting to adorn your phones and iPads and computer screens. 

Prickly Plants_all devices_2000px.jpg
Prickly Plants_iPad & iPhone_2000px.jpg

I can’t offer you a tall glass of ice-cold water to beat the heat, but I can give you a collection of whimsical, pretty little desert plants to cool the eyes. :-)

Enjoy!

* As always, these are for personal use only.


Prickly Plants

Mobile: iPhone // Android

iPad: Pro 11” // Pro 12.9” // Others

Laptop: MacBook Pro 13” // MacBook Pro 13” with calendar // MacBook Pro 15” // MacBook Pro 15” with calendar

Desktop: iMac 27” // iMac 27” with calendar 


Wallpaper Wednesday: Seven, Eight, Lay Them Straight

Happy new year!

I hope the first few days of 2021 have treated you well - or at least marginally better than the train wreck that was 2020. How was your new year’s eve? Ours was spent quietly at home, doing nothing much. I think I was reading in bed when the clock struck midnight, and everyone else in the house was fast asleep. We went on a short staycation in the city over the new year’s weekend, but apart from that, it’s been pretty much like any other day in this pandemic-stricken world of ours.

This time last year, I’d dived into a 30-day pattern challenge, with all the gusto and optimism a (normal) new year typically brings. No such resolutions or challenges this year. It isn’t that I’ve lost all hope, or that I’m walking around shrouded in a dark melancholic veil of doom and gloom (although there are those moments...); I’m just being realistic about the amount of time I will have this year. With the pandemic (still) wreaking havoc over our daily lives, who knows what the year will be like. We’ll just have to take it one day at at time. 

So enough with being sombre... let’s add some colour to our lives! Since it’s a new year and all, it’s a good time to refresh our device wallpapers and screensavers, don’t you think?

SevenEight_All Devices.jpg
SevenEight_iPhone.jpg
SevenEight_iPad.jpg

This month’s wallpaper freebie is one of my favourite patterns from last year’s 30-Day Challenge - SevenEightLayThemStraight. What I like most about it is the colour palette. The muted blues work well with the pastel grey, yellows and peach, and it just makes me feel... calm. I also like how the lines are wonky and uneven but neatly arranged - perhaps a metaphor for this new year? If 2020 was the year that upended our lives and left all its pieces in a jumbled heap on the floor, perhaps this year we’ll be able to pick everything up, little by little, and slowly arrange it in a way that makes sense to us. 

We can only hope. 

Oh, and I’ve added a little bonus this year - a monthly calendar! The desktop and laptop wallpapers now come in two versions: with or without the current month calendar. Hope you like it!

As always, these wallpapers are for private use only.

Enjoy!

-A-

Introducing: Wallpaper Wednesday

If you like to change up your tech wallpapers and screensavers every so often, and if you like some of my patterns and artwork, then you may like…

Wallpaper Wednesdays!

On the first Wednesday of every month, one of my designs will be available as a free downloadable for you to use as a wallpaper or screensaver for your phone, iPad/tablet, laptop, and/or desktop. (For personal use only)

To kick things off, let me introduce…

Vitamin C!

Vitamin C_All devices_1200.jpg
Vitamin C_iPhone_1200.jpg
Vitamin C_iPad_1200.jpg

This pattern began as a random watercolour doodle in my sketchbook a couple of years ago. I had just gotten my hands on a set of Dr Ph Martins liquid watercolours, and I was trying them out. The doodles stayed in my sketchbook until recently, when I felt a bit uninspired and started leafing through my old sketchbooks. I found the sketch, and decided to practice making a seamless repeat pattern in Photoshop.

Orange Slices Sketch.jpg

Vitamin C is a fresh, fruity, and sunny pattern, which will brighten up a gloomy day (we’ve been having a lot of those lately).

I hope you like it, and I hope it’ll make you smile :-)

Enjoy!

The Watercolour Batik

A friend of mine - J - is moving abroad for work, and she asked me to paint her something that she could bring with her, that would remind her of home. She said she had batik in mind, but gave me the freedom to explore other ideas, too.

Her commission was a much needed shot in the arm. We were eight weeks deep in the Movement Control Order aka MCO aka lockdown, and I was feeling a bit tired with very little motivation to paint or design any patterns. Between having the kiddo at home 24/7 (he’s at a very active and talkative stage right now), and the extra chores that inevitably came with the lockdown, I honestly just wanted to spend my downtime catching fish on Animal Crossing. So when J told me she wanted a painting, I was more than happy to set to work!

The “research”

I thought of all the traditional cultural references I could use, but I started with batik because that was what J had in mind. I rummaged through my wardrobe for pieces I could use as reference, but I have a laughable collection of batik sarung (I’m more of a t-shirt and shorts kinda person when lounging at home), and the batik baju kurungs and pareos I wear to weddings and raya events are more abstract and modern. I wanted something more traditional.

Thank heavens for Mr Google!

After browsing through pages and pages of batik images and pinning some I liked, I sketched out a few ideas and started thinking about the technique I wanted to use. Do I use masking fluid to try and replicate the wax resist technique employed by batik craftsmen (and women)? Or do I want to only use the motifs as inspiration? Do I want to make my piece look like batik, or do I want it loose and abstract?

I eventually decided not to use masking fluid, as I thought I could get more precise details with a brush or dip pen and white acrylic ink. (This is purely due to my inexperience and lack of practice with the medium, not a fault of the medium itself).

The colour palette

Most of the traditional batik that I used as reference had a lot of warm reds and blues, with some green and brown as accent colours. I wanted a softer colour palette instead; something more pastel-y. I was in the mood for cool pinks and purples at the time, so I built my colour palette around that, with some cool blues and greens thrown in.

It was a perfect opportunity to test out my new Sennelier paints :-)

The sketch(es)

I definitely needed a sketch for this piece; there were a lot of details that I wanted to plan out beforehand. I made several rough thumbnail sketches to figure out whether I wanted the piece to be an abstraction of traditional batik motifs, or something more “literal”. I eventually decided to go with the latter. In other words, the painting would have a badan kain (literally the “body”; the largest area of the batik sarung), a kepala kain (the “head”; a smaller, rectangular portion of the batik, where the motifs were usually different from the badan), and a gigi kain (the “teeth”, ie the margin that runs along the top and bottom edges of the batik sarung). There is also a broader margin called the gunung kain that runs below/above the upper/lower gigi kain, but I chose to exclude that detail.

The sketches.

The pucuk rebung motif was something I often found on the kepala kain of the batik pieces that I looked up for reference, so I wanted to include a simplified version of it in my painting. The motifs on the rest of the painting - on the badan, the papan (the two narrow rectangles in the kepala portion), and the gigi - were not based on any references. I left the tanah kain (literally “ground”, aka the background) white. I had tried a couple of mini test paintings with a background wash, but I preferred the way the colours popped against a white background. Had I used masking fluid, however, a background wash would’ve made more sense, and been closer in technique to the real batik process.

A simplified version of the pucuk rebung motif.

Bring on the bling!

As I was looking at all the different batik I’d googled, I realised that my favourites were the ones which had a lot of fine details and dots which added texture and highlights to the overall design. I liked the idea of a detailed, textured piece, and I’ve always enjoyed adding ink details (especially dots!) to a watercolour painting or doodle. I wanted to try out a newly acquired bottle of white acrylic ink, and I was tempted to add shimmery metallic details as well. Any excuse for some bling! I started out using a dip pen, then switched to the thinnest brush I own, and then found myself going back and forth between the two tools depending on my mood, undecided as to which one I preferred.

Mmmmm shimmery goodness…

Adding the metallic details was perhaps my favourite part of the process, so much so that I had to stop myself from covering the entire painting with tiny little metallic dots. Instead, when I reached the final portion of the background which was still untouched and paper-white, I decided to ask the opinions of friends - via an Instastories poll. The majority of those who replied voted for me to keep it clean, without any additional details - so the decision was made for me… and the painting was done!

The finished painting, ready to be delivered.

I actually painted a second option for J; also a batik-inspired piece. I typically do this - paint more than one option - if I have the time. It’s a way for me to experiment with different styles and approaches, and I just like to provide options if and when possible. It was this first painting that J chose eventually. The metallic details won her over, she said :-)

The piece is now safe in the hands of J. Hopefully it will survive their trip, and brighten up a wall of their new home.

-A-

Watercolour Doodles: Drifting

I remember this one. I had Yayoi Kusama on my mind, and I was filling my sketchbook pages with spiralling lines of polka dots and circles. Some in ascending order of size, others descending. Some snaked their way across the pages of my book in monochromatic fashion, others skipped and hopped through a rainbow of colours.

It was therapeutic. I would zone out while painting those circles, one by one, trying to make each one just slightly smaller or bigger than the previous one, moving from one shade to the next.

Yayoi Kusama on my mind.

Yayoi Kusama on my mind.

Gimme all the colours!

Gimme all the colours!

Then I got sick of circles and polka dots.

So I painted squares instead.

I was also sick of the orderliness of the shapes gradually ascending or descending in size, and I wanted some negative space.

So I ended up with this:

Drifting_1800px.jpg

Drifting

I had a new addition to my paints at the time, and I used it for this painting. It was Daniel Smith’s Undersea Green; a colour that, for me, conjures images of scaly reptiles, seaweed swaying in the ocean depths, and humid mangrove swamps. If you’re a cat owner, like me, it may also remind you of one of the more wonderful perks of having a pet cat: hairball vomit.

But I’m pretty sure you’d agree that “Undersea Green” is a much better name than “Cat Vomit”, or “Hairball”.

And I can promise you I was NOT thinking of my cat’s occasional gifts to us when I was painting this.

Transition

I love autumn; it’s my favourite season of the year. I love everything about it: the cool, crisp air; the smell of apple and cinnamon and cloves that gently surrounds you as you browse through the markets; and the colours.

The gorgeous, gorgeous, colours. The reds, the golds, the deep, burnt oranges… so rich and warm and stunning.

Did I mention I love the colours of autumn?

Living on the equator, though, means that the only seasons we get are hot and balmy, hot and hazy, and tropical thunderstorms with a dash of flash floods. Which means I need to live vicariously through my watercolours.

Transition_1_1800px.jpg

Transition I

Transition_2_1800px.jpg

Transition II

Like a lot of the stuff I’ve been doing lately, these pieces started out as watercolour doodles (I was actually doodling mimosa flowers and leaves for another piece). As usual, I then digitised the doodles and continued working on it in Procreate. I played around with different colours and hues, and added some inky details.

To be honest, I was initially trying to channel an Andy Warhol vibe when I was creating these pieces, but somewhere along the way I started thinking of the changing colours of leaves in autumn, and I decided to go with that instead.

Transition II is my personal favourite; and now that I look at it, the colours of Transition I remind me of a flag - I just can’t remember which country.

What do you see?

And which season’s your favourite?

Watercolour Doodles: Urban Living

I’d gotten my hands on some new paints, and was swatching all the colours for reference. I had some leftover in my palette, and I didn’t want to waste any of it, so this happened:

Original Doodle_1800.jpg

The Doodle

It looked like a bunch of high rise apartments to me, so I digitised it and added some details. I like the look of watercolour and ink; I think - especially with more loose or abstract watercolour pieces - it lends a playful, illustrative, vibe. So in Procreate, I played around with some “inky” details:

Urban Living_1800.jpg

Urban Living

I also wanted to try another style, so I eschewed the ink outlines, added some shading to give the shapes some depth, and then had fun with splatters:

Urban Living2_1800.jpg

Urban Living 2

I can’t make up my mind which one I like better; some days I prefer one, some days I prefer the other.

Which one do YOU like, and what do they look like to you?

Watercolour Doodles: Orange Polka

I’ve been struggling to find ideas or inspiration for new patterns or paintings lately, so I decided to look through my sketchbook to find old watercolour doodles to breathe new life into. I found a few that looked half decent, so I scanned them and cleaned them up in Procreate. I then created seamless repeat patterns in Photoshop.

I’ve been meaning to learn how to use Photoshop for a while now; there are times when I want to use watercolour to paint motifs for a pattern, and Photoshop retains that lovely painterly look you get from watercolour. It’s possible to use Illustrator as well, but there are certain limitations and for it to work I would need to paint with Illustrator in mind.

In any case, this has been a good exercise for me. Using Procreate instead of Photoshop to clean up the digitised paintings/doodles is great because I’m not stuck to my desk and I can do it anytime and anywhere; while waiting for my son in swim class, while taking a quick coffee break in the morning, or while listening to an audiobook.

Once I’ve cleaned it up (nothing fancy; I just remove the background and clean up the edges. Maybe adjust the hue and saturation a bit), I open it up in Photoshop and create a repeat. It’s actually not as complicated as I thought it would be. I still find Illustrator easier, but it’s nice being able to use both.

As I was going through my doodles, I noticed that there were quite a few pages filled with circles and polka dots; it seems that my default doodle is circles. Does that mean anything? No idea.

This pattern I’ve named “Orange Polka” (how original!), was done using watercolours, Finetec metallic pigments, and colour pencils. The metallic sheen of the Finetec pigments didn’t translate well digitally; but that only means there’s more for me to learn in Photoshop! :-)

Orange Polka Pattern_1800px.jpg

Orange Polka

Orange Polka Original.jpg

THE ORIGINAL ARTWORK/DOODLE

Painting in Fuchsia

One of the first commissions I received was for a “moody” cityscape, so I painted a “melting” image of the KLCC Twin Towers and the KL Tower.

I used Daniel Smith’s “Moonglow” watercolour, which is a lovely, complex, granulating colour - thanks to its blend of three pigments: PG 18, PB 29, and PR 177 (ie Viridian, Ultramarine Blue, and Anthraquinoid Red). The deep violet hue lends itself nicely to the “moodiness” that I was looking for in the painting, and because the pigments granulate (ie when mixed with water, they separate from the binder and settle in the tiny valleys of the paper, leaving a grainy texture when the painting is dry), I didn’t really need to do much. I just let the pigments flow with the water, and let the water do most of the work. What resulted was a monochromatic painting that had depth, texture, and ultimately - character.


Moody KLCC.jpg

After I had completed the painting, another friend requested a similar one, but in fuchsia. From the outset I knew that this painting would have a totally different vibe from the first one, simply because of the colour; fuchsia isn’t a hue typically associated with gloominess or moodiness. This didn’t pose a problem at all, since the person who commissioned me - a friend from university days - never mentioned anything other than wanting it in that bright, cheerful shade. Why am I not surprised, I thought. Fuchsia is so her.

As I set about painting the piece, I realised that it would differ from the first painting not just in its colour and overall vibe, but also in the way I paint it. And along the way, I learnt a few things.

First of all, the characteristics of different pigments and, to a certain extent, brands of watercolour paint matter (only in the sense that some brands are more granulating than others). In this case, it was primarily the granulation of the pigments that threw me off. I tried using just one colour at first - Winsor & Newton’s Quinacridone Magenta (PR 122) - but I felt the result was a bit flat. I then mixed in a second colour - Daniel Smith’s Quinacridone Red (PV 19) - and tried painting in layers, but again, I didn’t like the result - it came out looking almost bloody and murderous. I don’t think that was what my friend had in mind. I tried mixing in a bit of M.Graham’s Hansa Yellow Deep (PY 97) and Quinacridone Violet (also PV 19, but a more violet version), but I found that the latter is a granulating colour, and didn’t sit well with the other three, which had little to no granulation at all. It also deepened the overall colour of the painting; it was no longer a bright, cheerful painting but a dark, shadowy one. Not what I wanted, either.

I tried layering… but it just ended up looking sinister.

I tried layering… but it just ended up looking sinister.

The granulating Quinacridone Violet just didn’t complement the other colours. At all.

The granulating Quinacridone Violet just didn’t complement the other colours. At all.

In the end I stuck with a mix of the yellow and the first two quinacridone colours, and added just a touch of Opera Rose (PR 122) - a bright, hot pink - to brighten things up. I liked it, but I still felt it needed something, so I took some gold paint and white paint marker and added some highlights - because why not?

Pretty, but lacking something…

Pretty, but lacking something…

That’s more like it. You can never go overboard with highlights, is what I say :-)

That’s more like it. You can never go overboard with highlights, is what I say :-)

When I started on this commission, I honestly thought it would just be a matter of painting the same image in a different colour. Turns out there was a bit more that I needed to understand and take into consideration, and in my opinion, although both the fuchsia and the Moonglow cityscapes are essentially the same image, they are two very different paintings.

Pretty In Pink

It had been a hot minute since I last played around with my watercolours, and there was a painting which had been “work in progress” for far too long, so last Sunday I took out my paints, filled two jars with tap water, grabbed my favourite brush, and started to paint.

A friend had asked me to paint her favourite flower - peonies - and I was on the third piece. I wanted to attempt a couple of different styles on this commission, so I could give her a few options to choose from. The first piece I painted was done in a loose style, using a combination of watercolour and ink. This is my favourite style - it’s a bit more playful and dreamy, and the imprecise brush strokes and “careless” ink outlines give the piece a more spontaneous feel.

Peonies Commission_1.jpg


For the second piece, I attempted a more “realistic” style - painting the flowers in layers and in sections, to avoid the colours bleeding into one another. For me, this style is an exercise in patience. I have to wait for the layers to fully dry before starting on the next one, and I need to “jump around the page” so that I don’t paint next to a section which is still wet. It’s also an exercise in how to control the pigment-to-water ratio, and in how much paint to load on the brush. In short, it’s the type of painting where I utter a silent prayer at the start of every brush stroke.

Peonies Commission_2.jpg


The third piece was done in the same style as the second - but at a much bigger scale. I don’t know what I was thinking, attempting to paint a blown up image of tightly clustered peonies. Which means an entire page covered in nothing but petals. I persevered, painting one petal at a time, jumping around the page, and fighting the temptation to paint several tiny petals as one. This one took me a few days to finish the sketch, and several more to finish painting (mainly because I need to eat and sleep and do the chores. Also, I need to keep my two-year old alive).

Peonies Commission_3.jpg

I was quite happy with all three paintings, and even happier when my friend decided to buy all three!

My husband later asked whether I felt sad that I didn’t get to keep any of the paintings - something which never occurred to me before. I didn’t - and I still don’t - feel sad at all. I enjoyed painting the pieces. It was a learning process for me, and in some measure it was therapeutic.

And it gives me even more pleasure knowing that it now resides in someone else’s home, brightening up their space, and hopefully, their lives.